My Alfred Setup
Alfred is my favourite piece of software on the Mac. It's fast. It's reliable. It's unobtrusive.
I've been using it since I started working on macOS in 2013. In this post I would like to show you how I use it, my custom workflows and some tips and tricks. (Note: You find links to used themes and wallpapers at the end of this article).
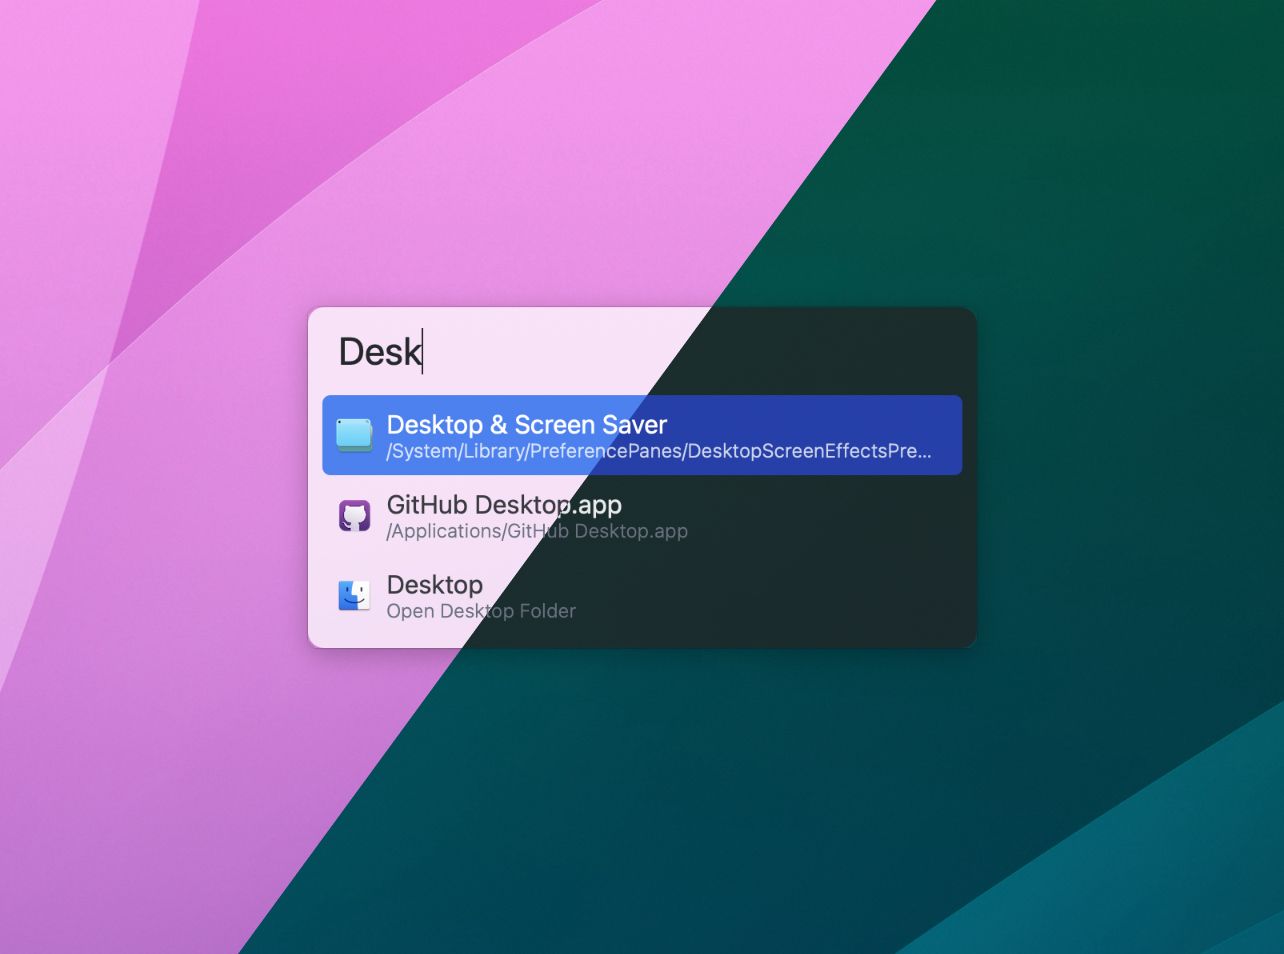
What is Alfred? #
macOS ships with Spotlight. A system wide search. In Yosemite, Apple redesigned the UI and Spotlight got a lot smarter. (You can do calculations or webs searches too).
Alfred is Spotlight on steroids. It uses Spotlight's search index to search files on your Mac, can start any of your installed apps and you can extend Alfred with custom workflows. The worfklow features become available when you upgrade and buy the "Powerpack".
With the basic summary out of the way, let's get started by replacing Spotlight with Alfred.
Use Spotlight Keyboard Shortcut for Alfred #
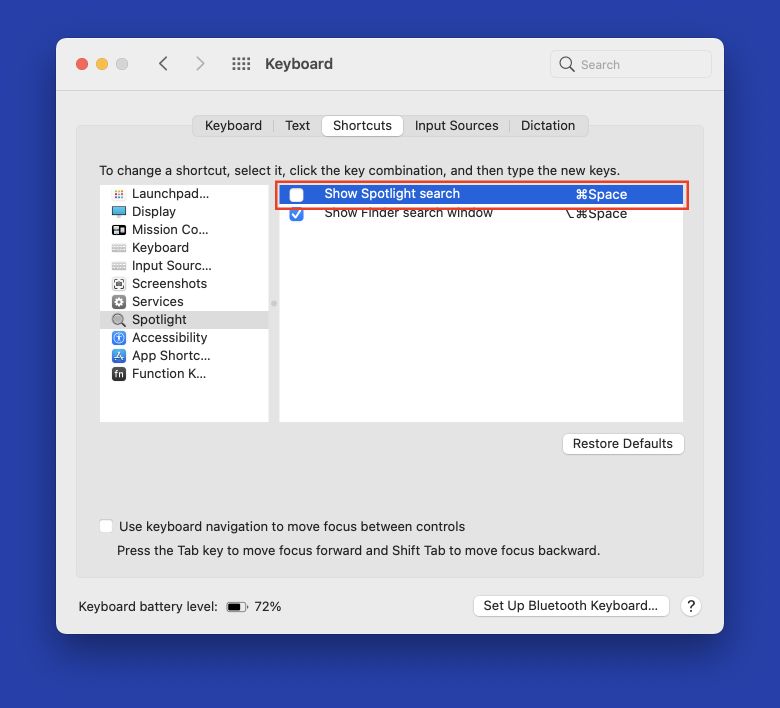
The first I thing I do, when installing Alfred on a Mac, is disabling the default keyboard shortcut for Spotlight (⌘+Space) and use it for Alfred.
To do that, open System Preferences → Keyboard → Shortcuts. Click on "Spotlight" and disable "Show Spotlight search".
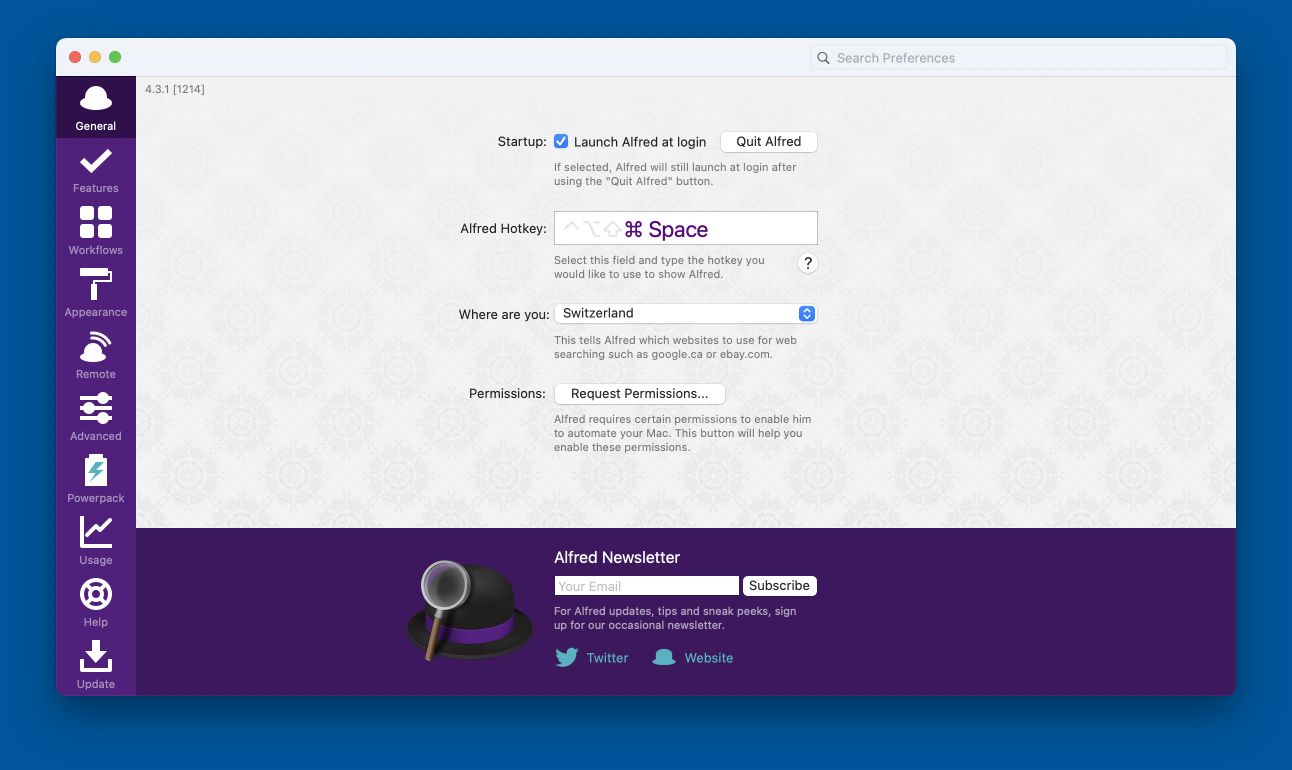
Open the Alfred settings and use the freed up ⌘+Space-combination to launch Alfred.
Custom Web Searches #
Web searches are the first powerful feature we take a closer look at. I use them everyday at work; but not necessarily to search. Let me explain:
In summary, a custom web search allows you to set up a shortcut to start a search on any website. It just passes the given search term to a URL. For example app Tony Stark expands to https://example.com/search?q=Tony Stark. So far, so good.
The way I use "web searches" in Alfred, is that my input is ususally an ID for a resource in one of my most used applications and not necessarily as a search term. Here are a few examples:
- Open the customer details page in our app.
app:customer 123expands tohttps://example.com/admin/customers/123/. - Open the invoice details page in our app.
app:invoice 123would expand tohttps://example.com/admin/invoices/123. ("invoice" is a generic example and you can adapt this to any other "thing" you use at your job (posts, sale, product, …)) - Open a JIRA ticket.
jira PROJ-123expands tohttps://jira.example.com/browse/PROJ-123. - Quickly open a personal GitHub repository by typing
ghm repo_name. The search url looks like this:https://github.com/your-username/{query}
Of course I also use it as a regular search too.Here are a few examples I use regularly. (Click "Import" to import the custom web search)
- Search MDN Web Docs.
mdn querySelectorAll. Import - Search caniuse.com.
can flexbox. Import - Search caniemail.com.
canemail grid. Import
I also have custom searches for different ecommerce sites I regularly visit. I can type groceries Toiletpaper and land on the search page of the desired online shop.
But I think you get the gist: The sky is the limit!
If you regularly go to a website and search for something or need to look up a "details page", consider creating a custom web search for it.
Clipboard History #
Copy and pasting is something I do everyday. Be it code, files, URLs, IDs or just text. Alfred ships with a clipboard manager, which allows you to paste previously copied text into your editor or email draft.
The best thing about it? It also supports images and file lists! What does this mean? Instead of just keeping track of copied text, Alfred also stores copied files and images in a buffer. You can then browse this buffer and paste text and images in any order you like.
I've remapped the shortcut to open the Clipboard History to ⇧+⌘+C. It's a bit more logical to me.
The clipboard history is something that takes some time to get used to. The first few days or weeks you forget, that it exists. But once you've understood it, are compfortable with it and know that it's available to you in every app, you don't wan't to miss it.
Snippets #
Yet another powerful tool hidden behind "Features" in Alfreds settings are Snippets. As the name might suggest, in snippets you can store often used text snippets. Be it canned email responses, fake credit card numbers to test your Stripe integration, Emojis or Mac Symols like ⌘ or ⌅.
I've updated the keyword to open the snippet search to be s. To paste the character → into a document for example, I then only have to type s right, select the right snippet and hit enter.
Markdown Fences #
My most used snippets do not paste readable text into the currently focused editor, but rather a set of characters. Backticks or "Markdown fences" to be exact.
For 20 years now, I've used keyboards with the Swiss-German layout. To denote a word or phrase as code in Markdown, you have to enclose it in backticks (`). On the Swiss-German keyboard layout you have to hit a weird combination which gets quite annoying if you have to type it a hundred times a day. I also quickly fall out of my writing flow.
So I've written 2 snippets to fix that.
First there is the "inline Markdown code" snippet, invoked by typing imdc. As the name suggests it's for highlighting code inline in a sentence (Like you've seen it scattered in the article you're reading right know).
For multi-line code examples I've created a "Markdown code" snippet, invoked by typing mdc.
The best thing is, that you can use the {cursor} variable to automatially move the cursor between the two backticks.
Here's is the content of those two Markdown snippets:
# Inline Markdown Code
`{$cursor}`
# Markdown Code
```
{$cursor}
```
Emojis #
My biggest snippet collection is centered around emojis. Wether you love them or hate them, sometimes you use them.
Joel Califa once created an "Emoji Snippet Pack". This collection of snippets allows you to type :v: to get the ✌️ emoji.
Since Joel released his pack, new emojis have been released, and I stepped up and created a build process to his open-sourced emoji pack (see PR #1).
However, my added build process relies on dependencies which very slowly update to newly released emojis (which is okay, as these dependencies are used for something different than a snippet pack).
That's why I've created my own project. You can find it on GitHub.
Currently it's the same as the one from Joel, but written in PHP. The goal is, to switch the source for the emojis to the official list of available characters from unicode.org.
A plus would then be to also create a new release when new emojis are being released by using GitHub Actions.
I will work on that project over the next couple of weeks.
Here's a quick video on how I use the emoji snippets.
Miscellaneous Snippets #
I also have snippets which actually contain text:
- Canned responses to support emails or unsolicited recruiter emails,
- Templates for certain types of notes I take
- Code snippets I regularly use
- Shortcuts for CLI actions (like ziping a folder on UNIX as I will never remember the options for
tar)
Workflows #
Next let's cover the most famous and powerful feature of Alfred: Workflows.
Workflows allow you to write basic programs with a drag and drop editor. You define the event that triggers the workflow (a hotkey, a snippet, a file action), define its input (keyword, file filter) and then take action it (open a file, run a search or run a script).
They can wary between very simple and very complex. For example "search this folder for that file type and open the file in that app" is quite easy to accomplish. "Search and play Spotify playlists" however is quite complex and needs a lot of scripting work.
So first I would like to show you some of my own workflows. They are quite simple but save me a couple of seconds every day.
Open Common Folders #
Eventhough Alfred comes with a backed in file browser, I often still use good old Finder.app. To get access to my most used folders quickly, I've created workflows which just open that folder:
downloadsopens~/Downloadsdesktopopens~/Desktopsitesopens~/Sites(where all my code projects live)inboxopens my File Inbox
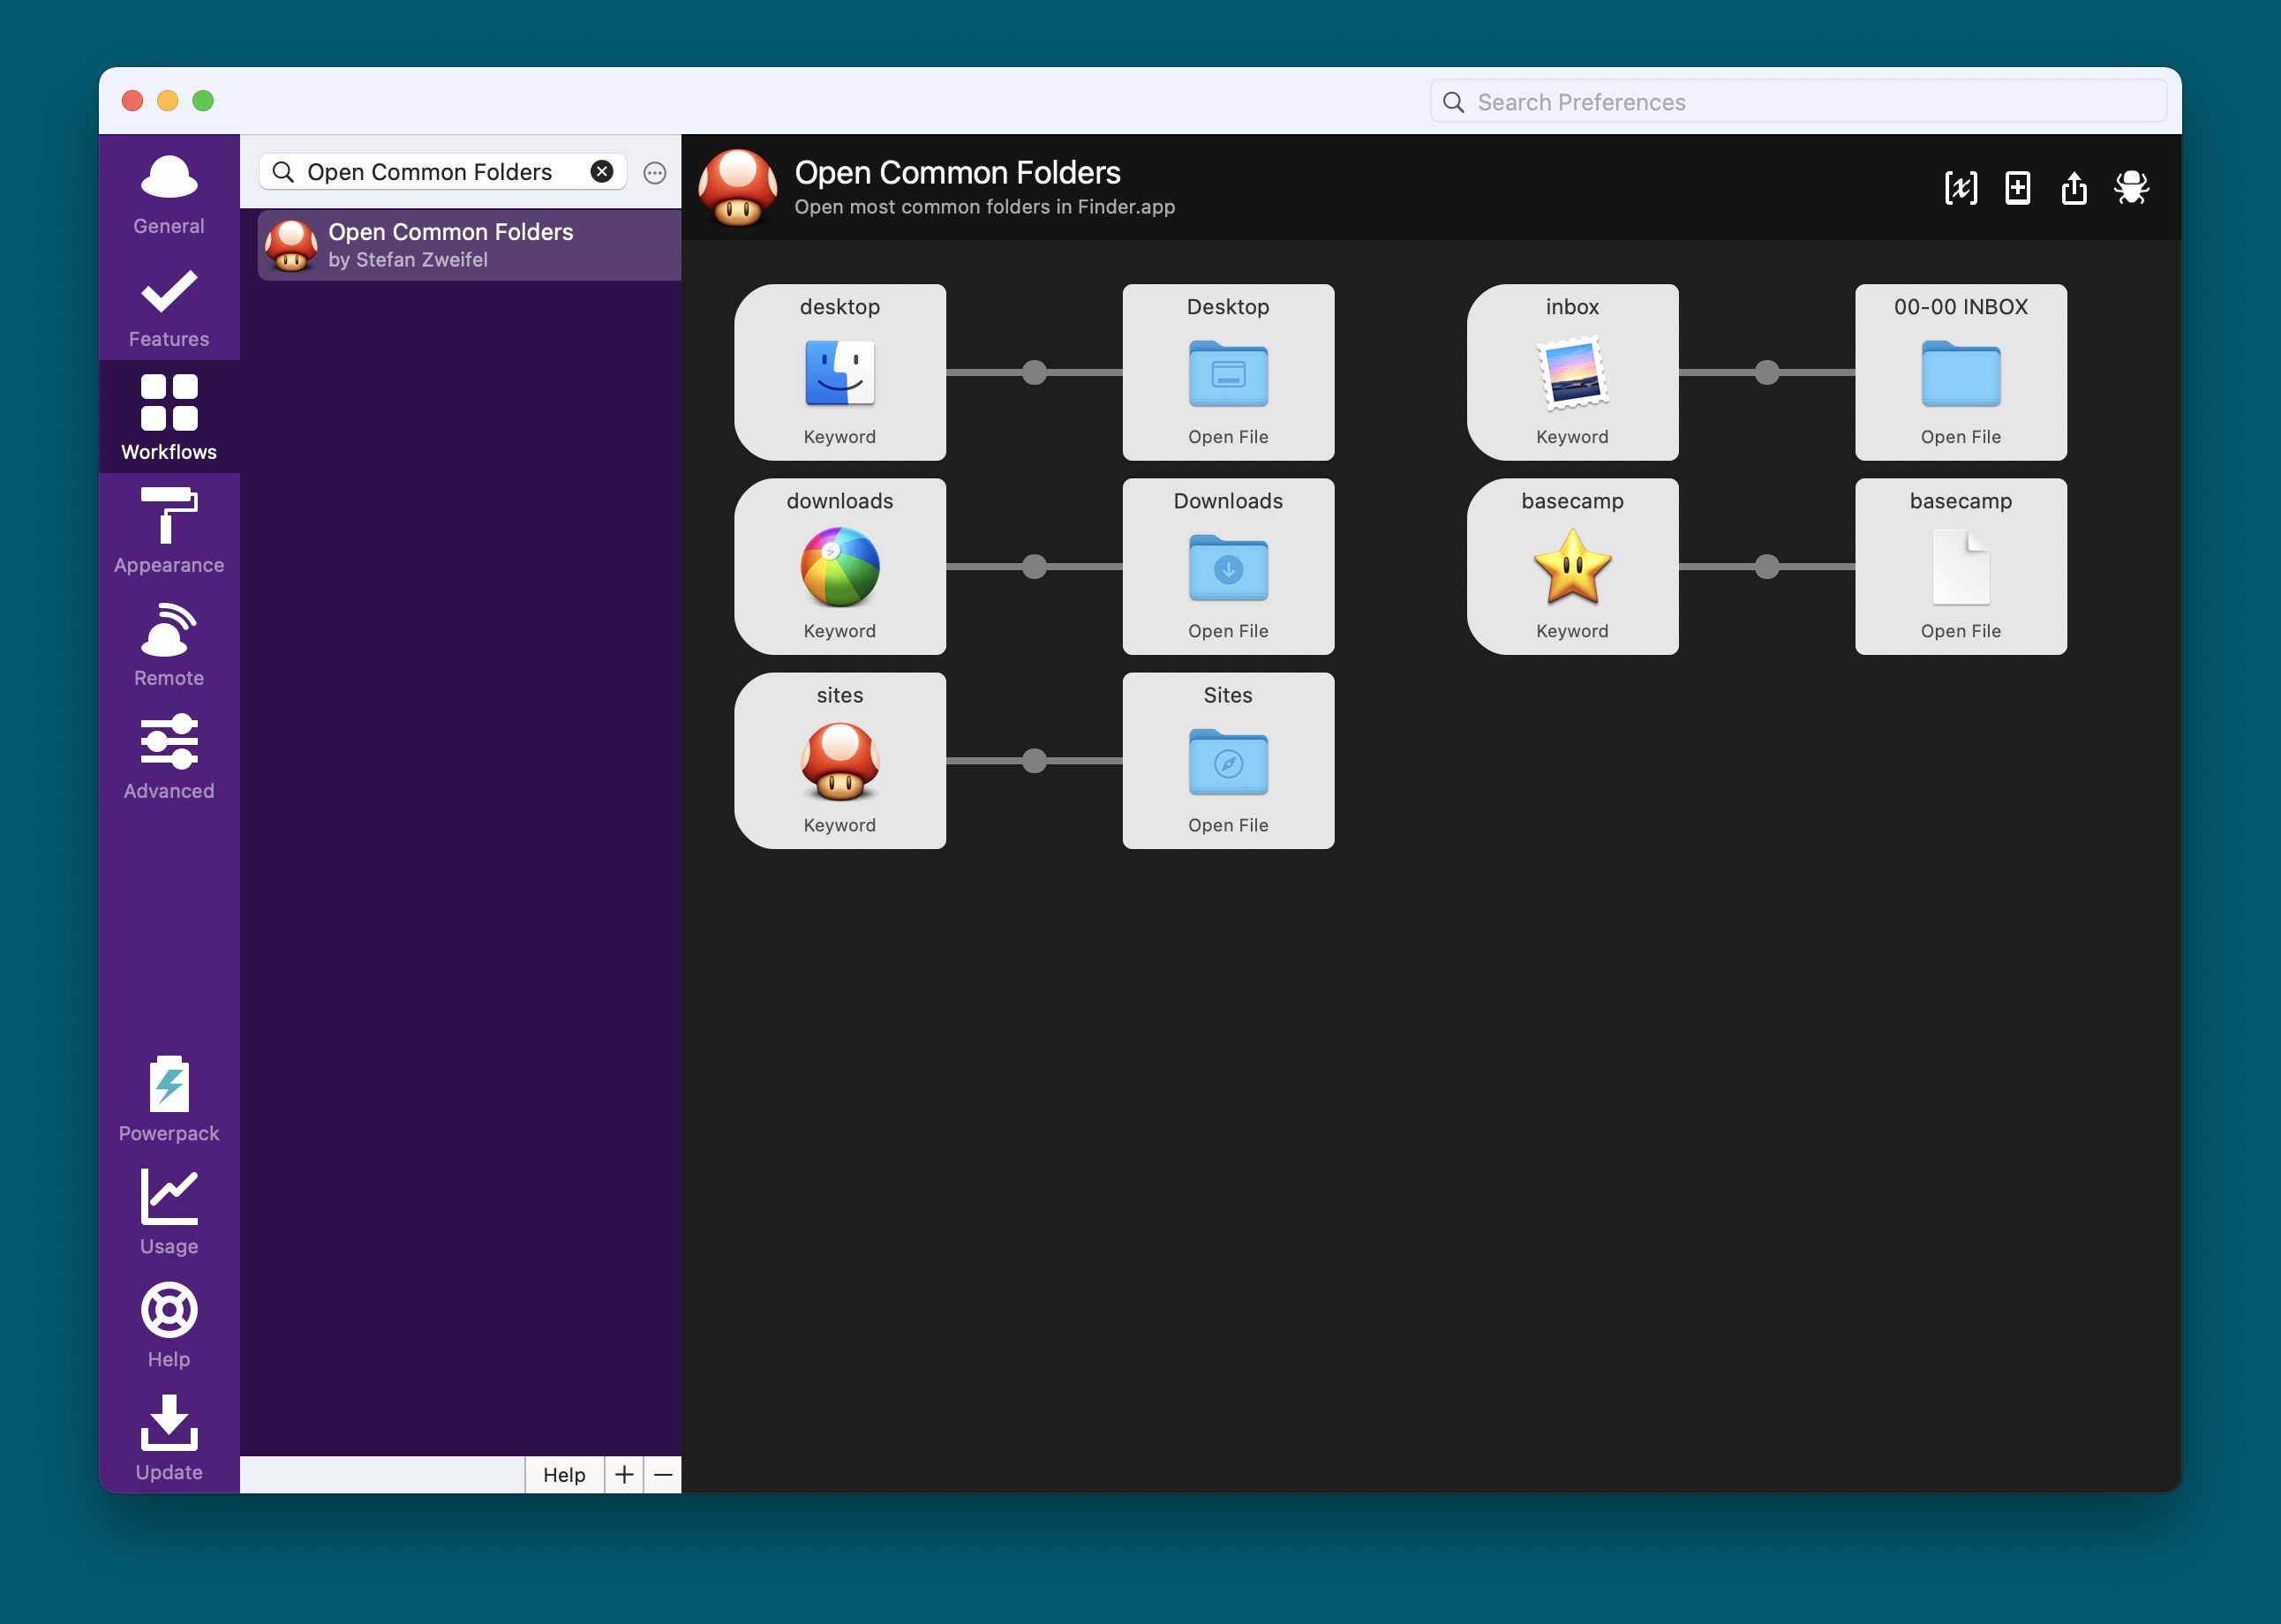
Workflows like these might look silly at first. But once you realize how much time you spend browsing Finder – by mouse or keyboard – you might change your mind.
File Filter Workflows #
Not used that much anymore but still handy, is my collection of file filters. I've created several workflows to search for files with a certain extension or just folders in a directory and pass that file to an application.
For example, I can type phps laravel-stats to open laravel-stats in PhpStorm.
Or I can type unzip backup and Alfred will search for .zip files which have "backup" in their name. Selecting the zip file will open it in The Unarchiver.
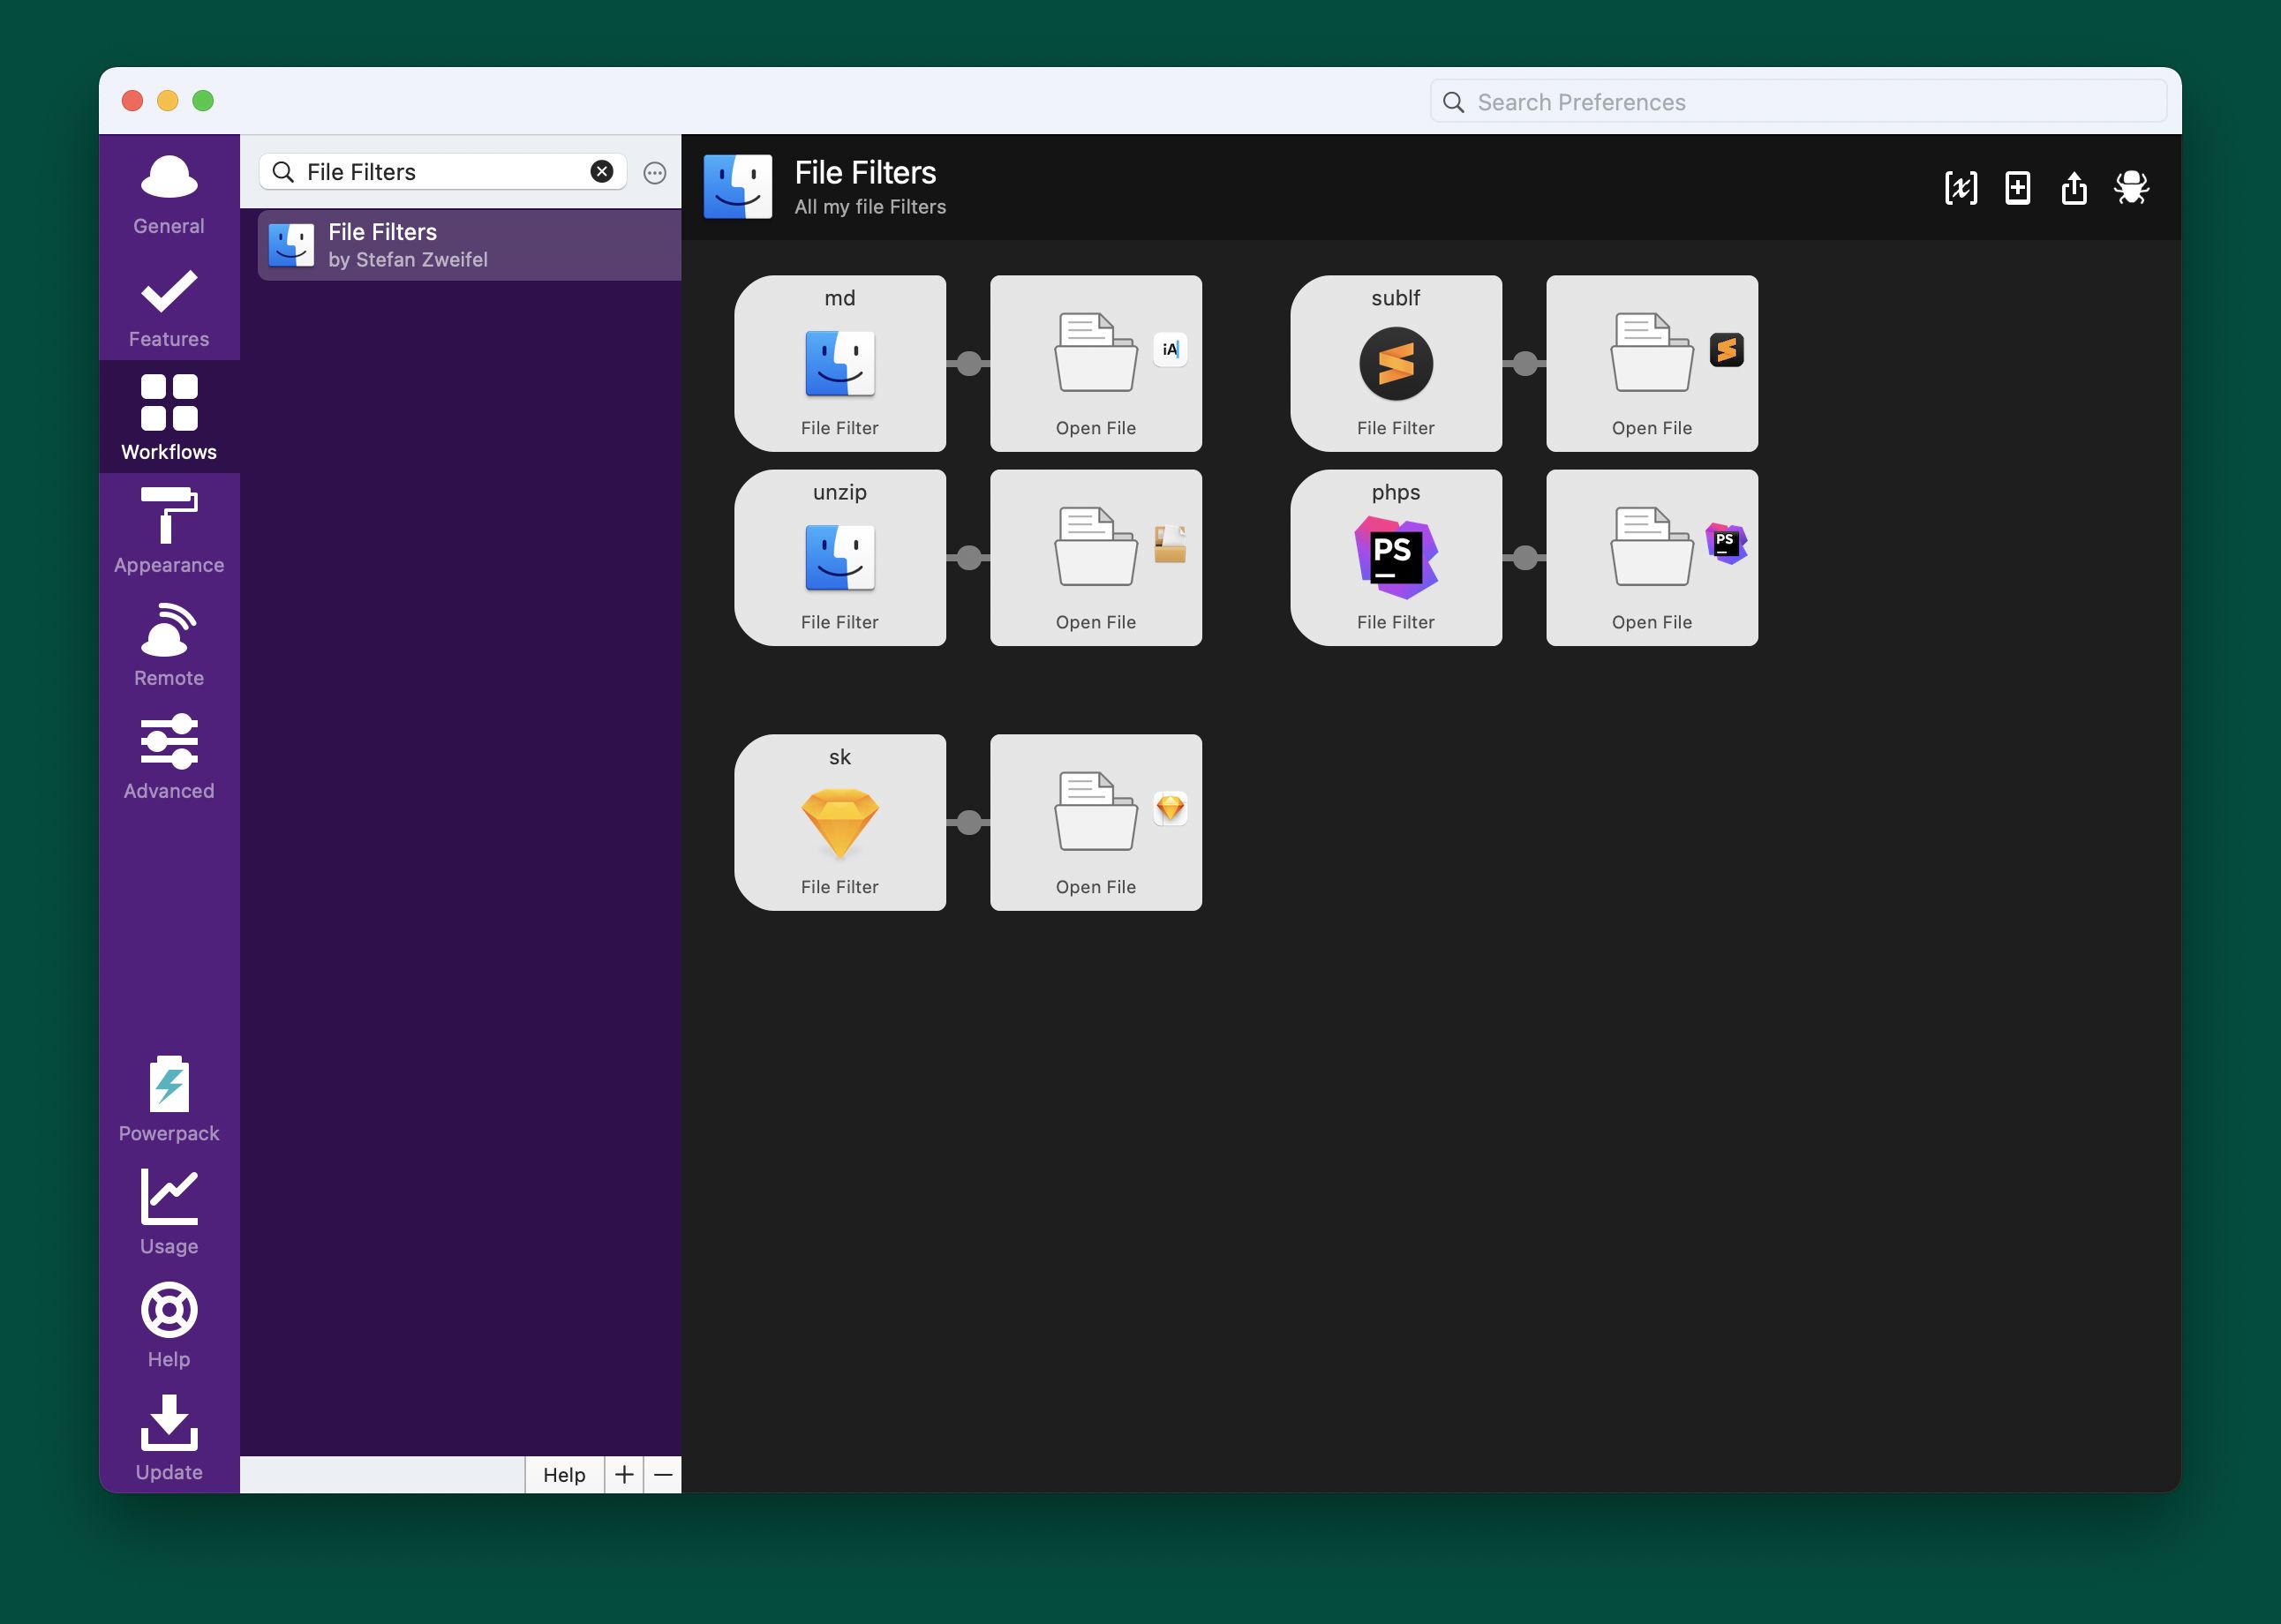
Here's a quick tutorial on how to set this up yourself:
- Create a new blank workflow
- Add a new "File Filter" input
- Set a keyword, title and subtext that matches what you want to do.
- Drag the file types you want to search for into the "File Types" box. For example, if you want to search for Markdown files, drag a
.md-file into it. - Then create and connect a "Open File" Action with your File Filter.
- Drag the app you want to open the files in, in the right most box
- Done
You can get quite creative. As you can see from the screenshot above, I've also created workflows to open Markdown files in iA Writer and Sketch files in Sketch.app.
NAS Managment #
I own a Synology NAS, for which I also created a few workflows. (Read more about my NAS setup here).
Collected under the name "Relaxo" (German name for the Snorlax Pokemon) I've created several workflows for interacting with the NAS:
- I can wake it up (in case it's not running)
- Open the web-based control center
- Open the Plex web player
- Or mount NAS disks to macOS
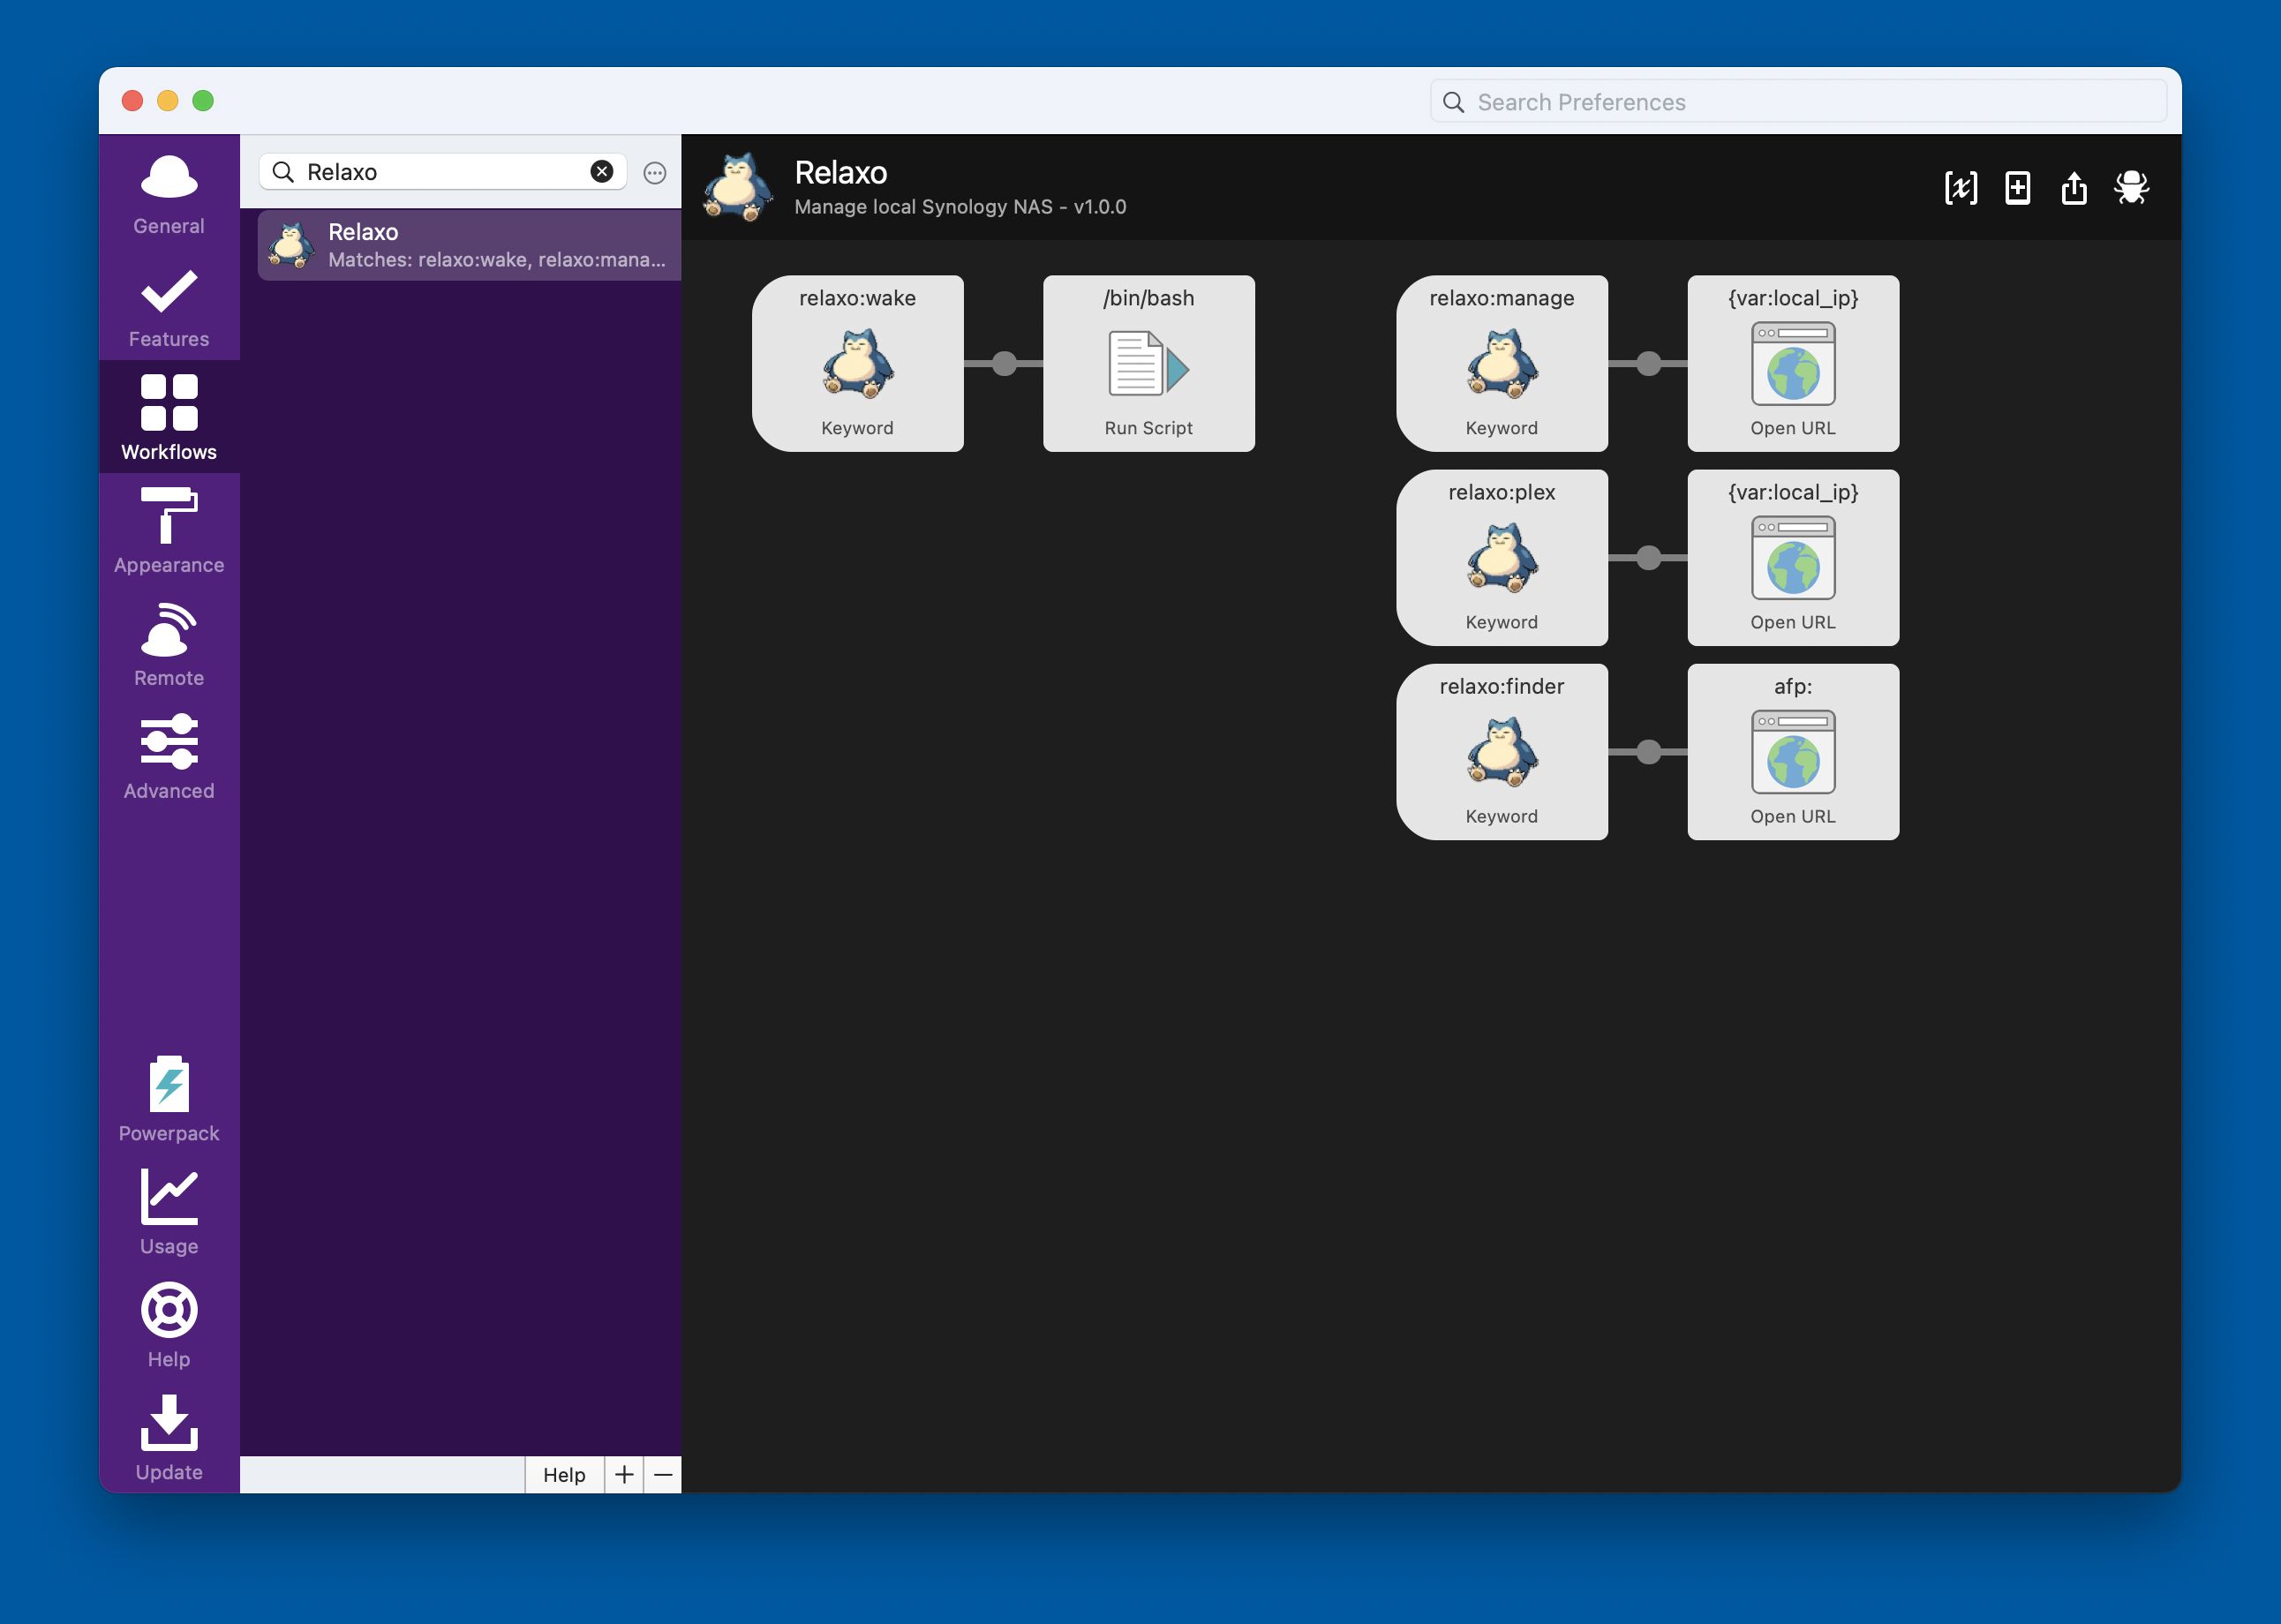
If you want to build something like this your self, here are a few tricks:
You can boot the NAS by installing wakeonlan on your Mac and running the following script in Alfred. ($mac_address is a variable for the MAC address of your NAS. You also need to enable wakeonlan explicitly in the settings of the NAS).
/usr/local/bin/wakeonlan -p 9 $mac_address;
Do open the dialog to select to be mounted disks, use the "Open URL" action and use afp://$name_of_your_nas.local as the URL.
Zettelkasten #
I try use the Zettelkasten method to store my notes. This means that is store all my notes as plain text files in a single folder and follow a common schema.
To create a new Zettelkasten note I naturally created a workflow. With z:new The Old Man and the Sea - Review Alfred creates a new note with the title "The Old Man and the Sea - Review", creates a unique ID for the note and stores it in the file and opes the note in iA Writer.
The other side of the coin is the z:find workflow. It consists of a file filter which searches for for .txt and .md files in my Zettelkasten folder. Matching files are opened in iA Writer.
I'm still growing into this Zettelkasten methodology, so I won't go detail here. If you're interested in it, I recommend reading the book How to Take Smart Notes.
Miscellaneous #
Not everything can be put into a neat category. Here are a few other custom made workflows I regularly use.
ngrok 8000 #
This workflow opens a new terminal tab and creates a new ngrok tunnel for port 8000. After a 1 second delay it opens the forwarding URL in the default browser.
In the terminal script in the Alfred worfklow, I define my region, desired subdomain and auth token, to get a predictable URL I can open in the browser.
b:new Title of Article #
Workflow used to create new blog posts. The input is the title of the blog post. Alfred slugifies it, prepends a timestamp, stores the file at the right place and opens the file in Sublime Text.
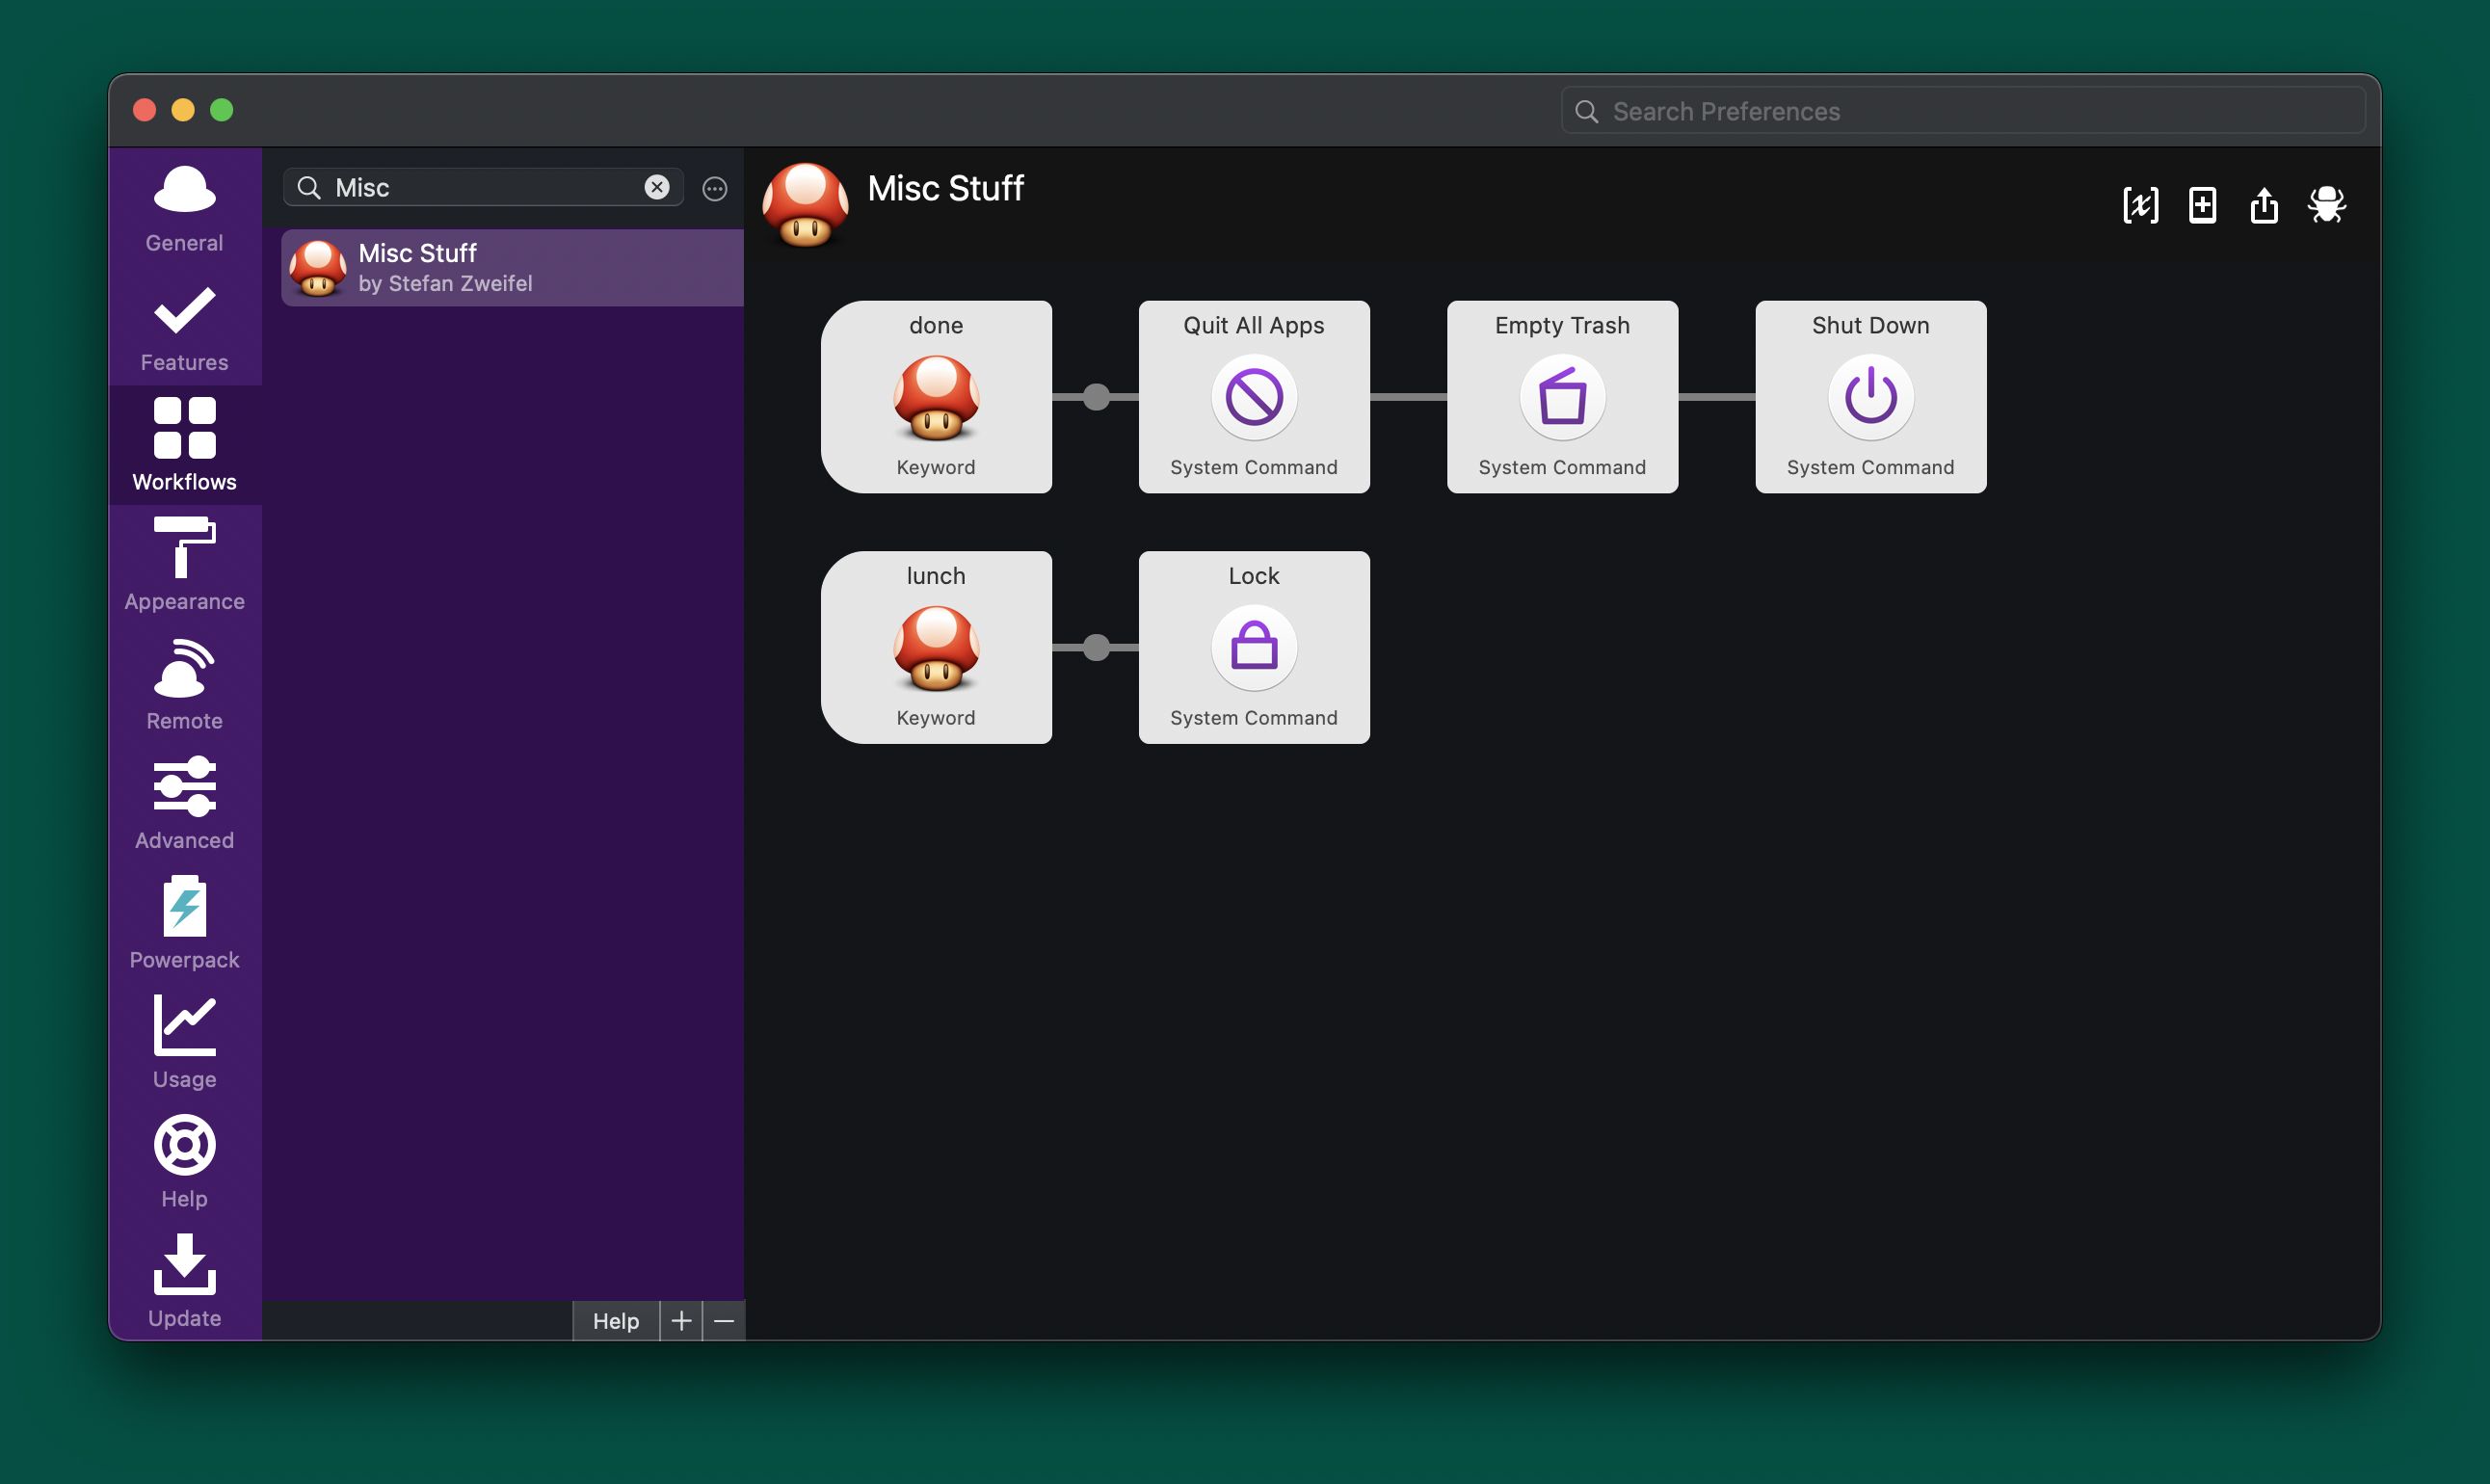
done #
At the end of the workday I run done. It closes all apps, empties the trash and shuts down my Mac. Simple as that.
Third Party Workflows #
Over the years, a huge community has formed around building very powerful workflows. Here are a few selected workflows I really enjoy.
- DAS.Units: A powerful unit converter that support natural language input. For example I can type
units 1 usd in chfto get the current exchange rate. - Kill: Search for a running process on your Mac and kill it.
- Dark Mode: Switch between light and dark mode on macOS
- TablePlus: Search through TablePlus connections and opens them.
- Laravel Docs: Search the Laravel documentation.
- Tailwind Docs: Search the Tailwind CSS documentation.
- Vue Docs: Search the Vue.js documentation.
There are countless workflows out there. If you regularly use a particular tool or website, I would suggest investing some time and search for workflows on the internet. If you don't find one, why not create your own and share it with the world?
Even more Features 🤪 #
Alfred comes with even more features than I already mentioned above. For example it comes with an integration with the Dictionary.app that ships with macOS. With define Anubis or spell necessary you get word definitions and spelling suggestions.
Or the "System" panel in Alfreds settings. Wether it's changing the audio volume, ejecting mounted disks, restarting the Mac, starting the screen saver or quitting or hiding a specific app; there's a keyword for everything.
Tip: Add your remote TimeMachine drive to the exclude-list for the Eject feature. That way, you're not accidentally ejecting the disk while TimeMachine makes a backup and you're running ejectall.
The cherry on top it all is the sync feature. Under Settings → Advanced you can define a custom storage location for all preferences. The folder can live on iCloud, Dropbox, or on any other sync service. This way, you can use the same settings on many Macs.
Big Little Design Details #
Besides the performance and flexibility of Alfred, I love it's attention to little design details.
For example: the update indicator. Instead of blocking me from using the app by showing a modal window – like every other app these days does – Alfred displays a small update indicator below the search input.
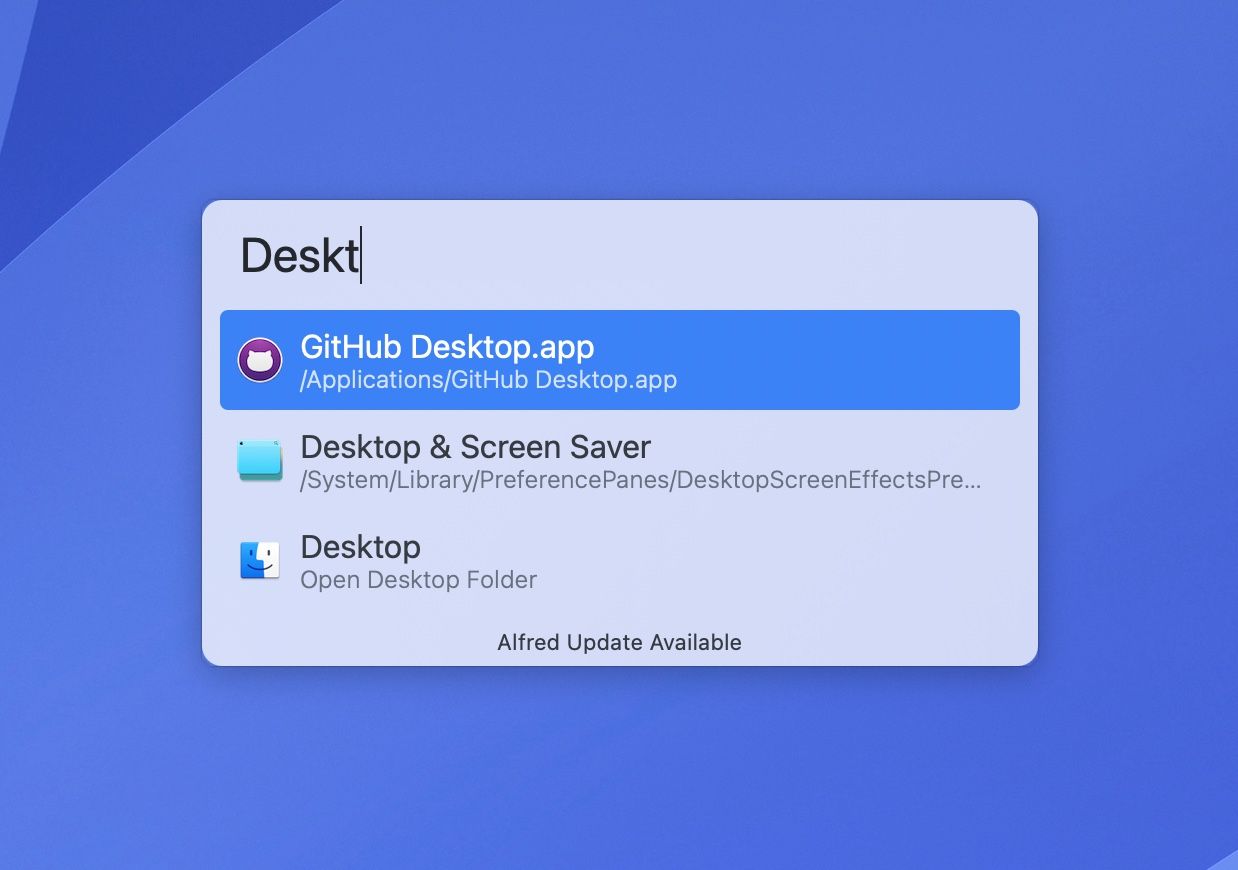
It's unobtrusive, fits in the design well and allows me to do the update when I want to. The app doesn't dictate it to me.
Outro #
Phew, that was a lot to take in! Thanks for reading so far.
I hope this post gave you some inspiration to what's possible with Alfred.
If you installed Alfred a while a go and felt, that it's the same as Spotlight, I hope this post challenged that view. And that you give it a try again!
If you never heard of Alfred before and are now eager to test it out, go give it a shot and download it for free.
If you have questions about this setup, critiques or want to share your own setup, reach out to me via email or Twitter.
Themes and Wallpapers #
As mentioned at the beginning of the article, here are links to the Alfred Themes and the wallpapers I'm using on my Mac.
- Light Alfred Theme: BigSur Light
- Dark Alfred Theme: BigSur Dark
- Aqueux wallpaper collection by Hector Simpson